开发自定义工具
工具(Tools)定义
工具(Tools)可以扩展 Monkeys 平台的能力,一些常见的 Tools 如下:
- LLM: 提供大语言模型对话的能力
- 知识库: 为 LLM 提供知识库问答的能力
- 自定义代码: 提供运行自定义代码的能力
- 翻译: 提供翻译的能力
- 语音识别: 提供语音识别的能力
- 图像生成: 提供图像生成的能力
- 小红书、Twitter、Instagram、微博等社交平台的自动化操作
等等等等,任何能够通过 API 调用的服务都可以作为一个 Tool,集成到 Monkeys 平台中。
如何开发自定义 Tool
如上文所说,Tool 就是一个可被调用的、满足 Swagger 标准的 API,除了编写 HTTP 接口之外,你不需要任何前置技能。
也正因为此,你可以使用任何语言开发你的 Tool.
整体来说,开发一个 Tool 需要以下几个步骤:
- 使用 JSON 定义你的 Tool.
- 编写 HTTP 接口,实现你的 Tool 逻辑.
- 部署你的 Tool.
- 在 Monkeys 平台中添加你的 Tool.
示例:使用 Python 开发一个查询天气的 Tool
初始化 Python 虚拟环境
创建 venv 环境,并激活:
mkdir monkey-tools-my-awesome-weather-toolpython -m venv venvsource venv/bin/activate安装依赖
这里我们使用 flask 框架,并用 flask_restx 构建标准 Swagger API。当然,你也可以使用任何其他你喜欢的框架。
pip install flask flask_restx requests添加 /manifest.json 接口
manifest.json 接口描述了你的 Tool 的基本信息:
- schema_version: 当前版本号,目前只支持
v1 - display_name: 在 Monkeys 平台中显示的名称
- namespace: 命名空间,用于区分不同的 Tool,建议使用
monkey_tools_前缀,如monkey_tools_my_awesome_weather_tool。此命名空间必须全局唯一。 - auth:
- type: 认证方式,目前支持
none和service_http两种方式
- type: 认证方式,目前支持
- api:
- type: API 类型,目前只支持
openapi - url: Swagger API 的地址,可以是相对地址,如
/swagger.json
- type: API 类型,目前只支持
- contact_email: 联系邮箱
示例如下:
{ "schema_version": "v1", "display_name": "My Awesome Weather Tool", "namespace": "monkey_tools_my_awesome_weather_tool", "auth": {"type": "none"}, "api": {"type": "openapi", "url": "/swagger.json"}, "contact_email": "dev@inf-monkeys.com",}在 Falsk 中,只需要在 main.py 中添加如下代码即可:
from flask import Flask, request, jsonifyfrom flask_restx import Api, Resource, fieldsimport traceback
app = Flask(__name__)api = Api(    app,    version="1.0",    title="Monkeys Weather API",    description="Monkeys Weather API",)
@app.errorhandler(Exception)def handle_exception(error):    traceback.print_exc()    response = {"message": str(error)}    response["code"] = 500    print("response", response)    return jsonify(response), response["code"]

@app.get("/manifest.json")def get_manifest():    return {        "schema_version": "v1",        "display_name": "My Awesome Weather Tool",        "namespace": "monkey_tools_my_awesome_weather_tool",        "auth": {"type": "none"},        "api": {"type": "openapi", "url": "/swagger.json"},        "contact_email": "dev@inf-monkeys.com",    }
if __name__ == '__main__':    app.run(host='0.0.0.0', port=5000)
在命令中运行:
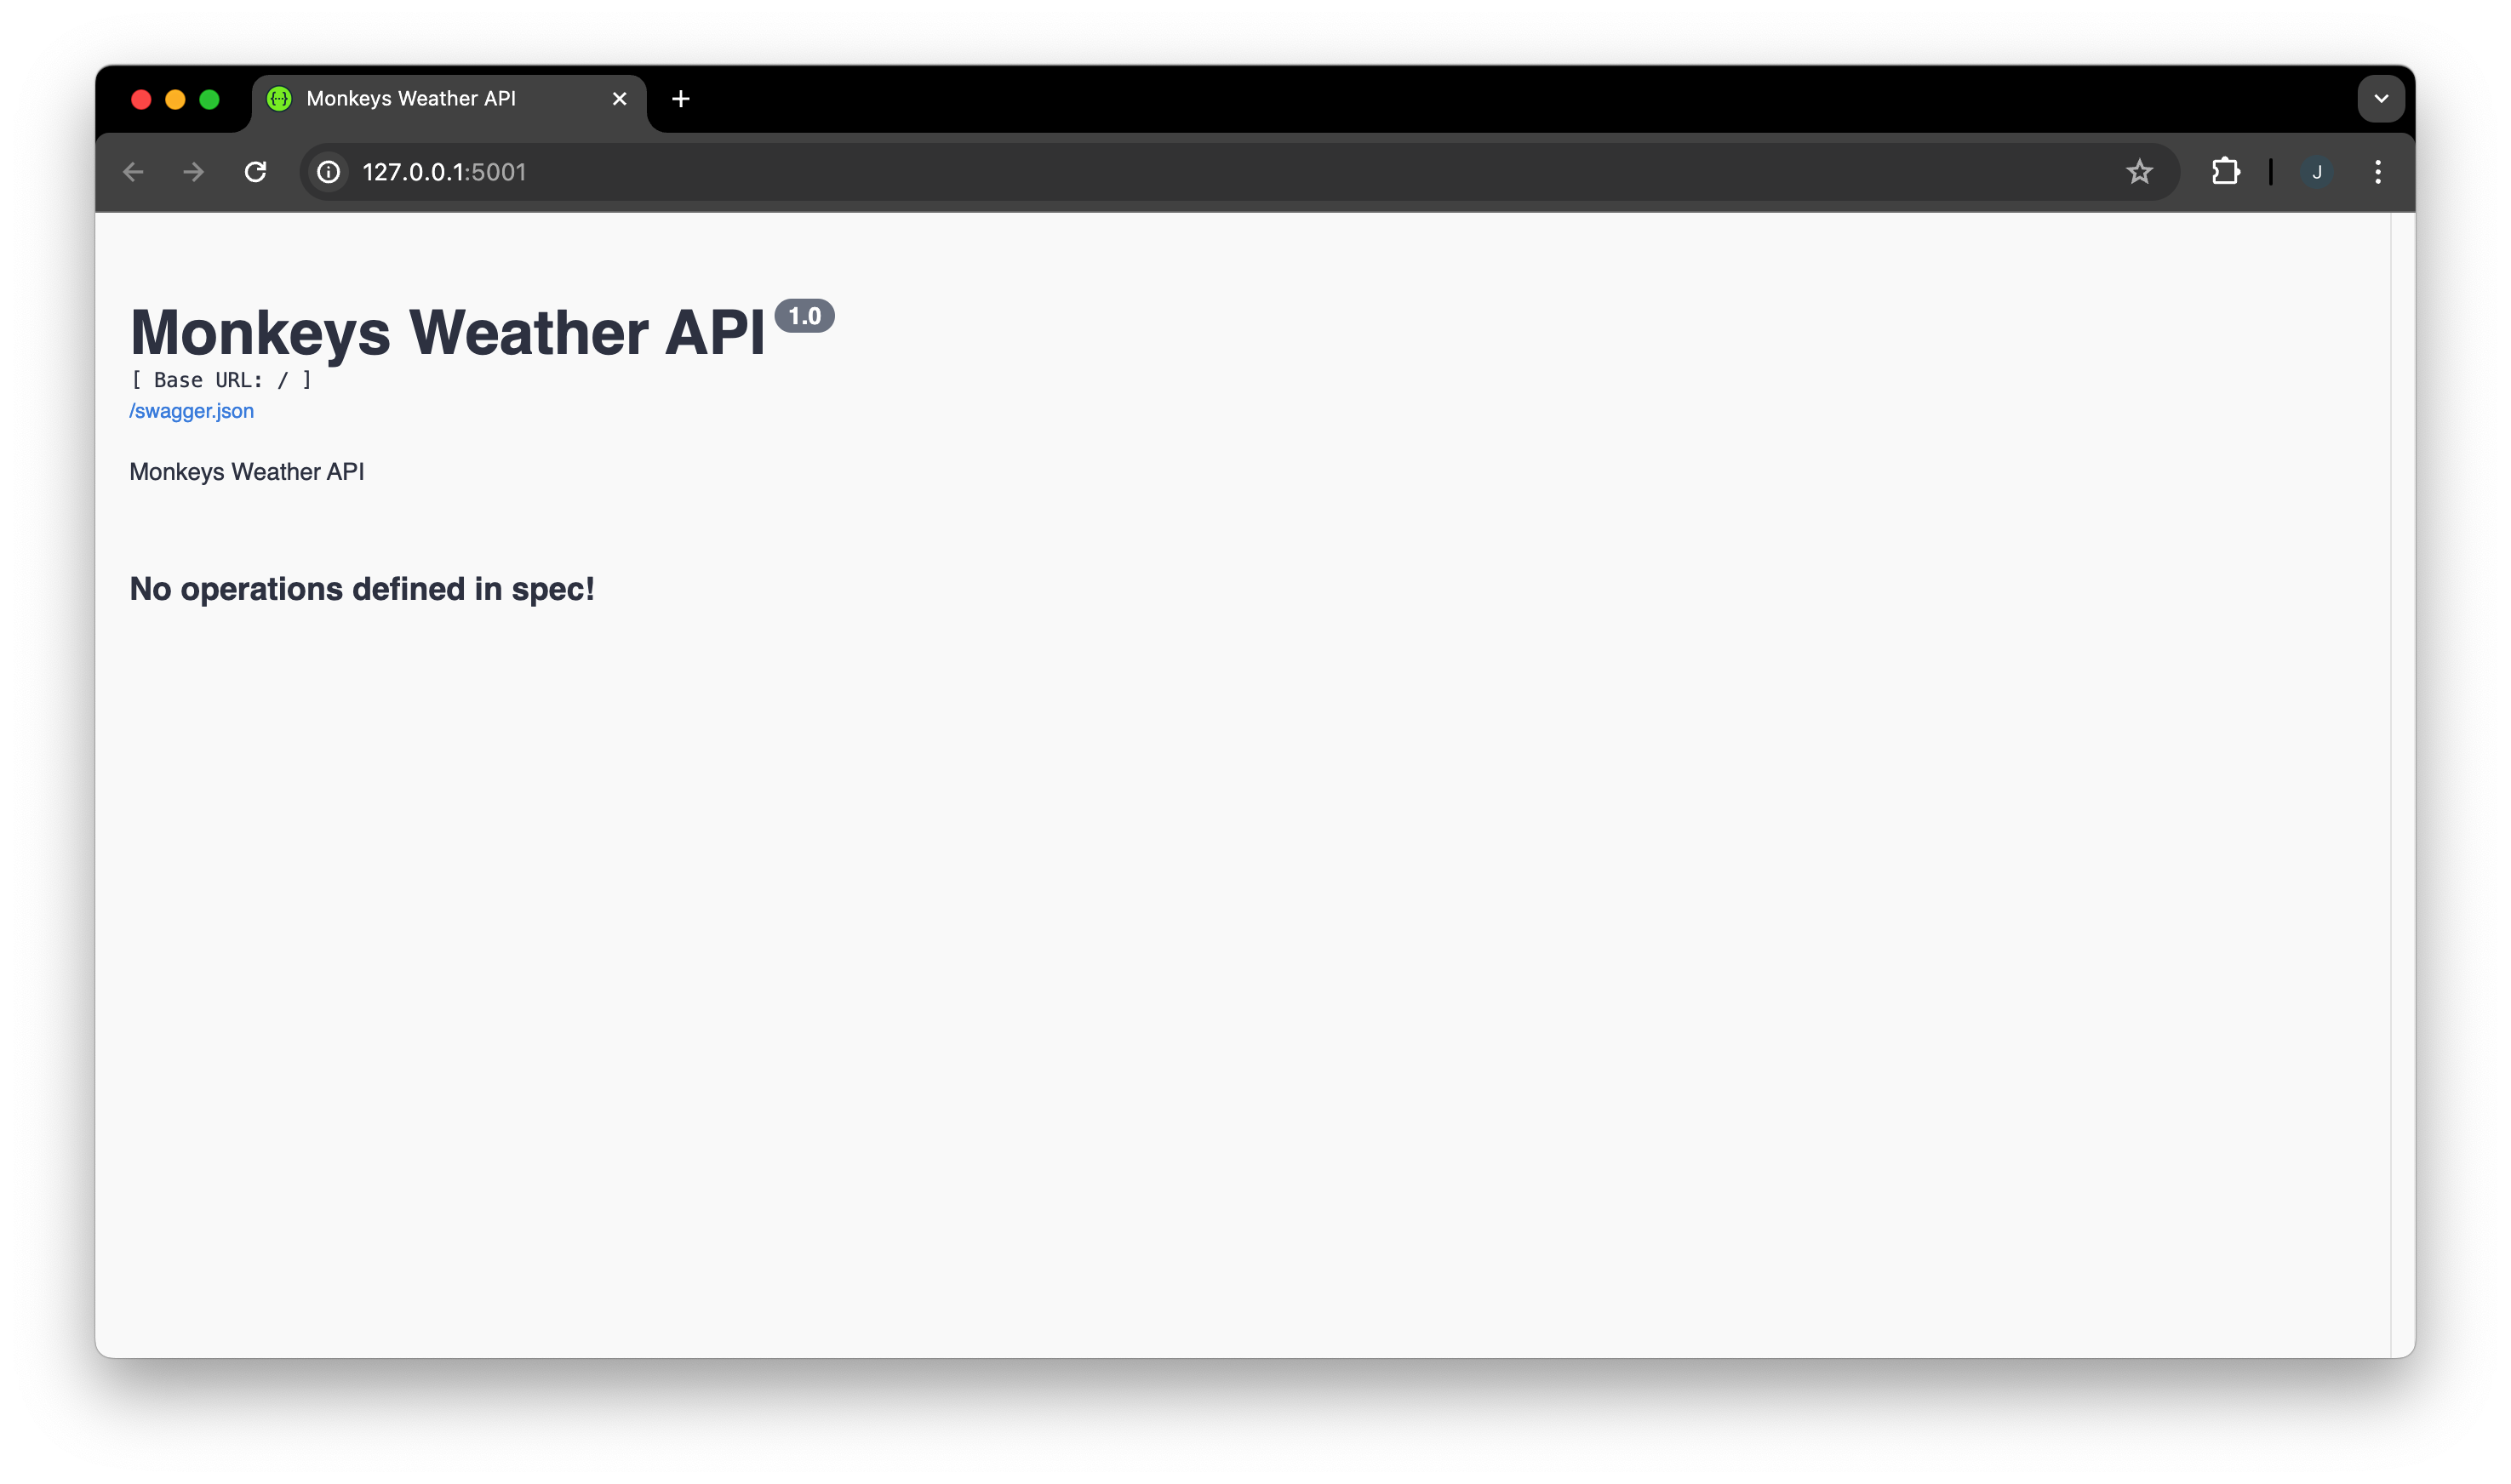
python main.py之后,你可以在浏览器中访问 http://localhost:5000,可以看到 Swagger API 文档已经自动构建好了,只不过里面还没有接口,下面我们开始编写实际的天气查询接口。
添加天气查询接口
这里我们使用 https://open-meteo.com/ 来作为天气查询的 API。
注意以下代码中的:
@weather_ns.vendor注解,这是 Monkeys 平台的扩展,用于描述 Tool 的详细信息,如输入、输出、估计耗时等。@weather_ns.expect注解,用于描述输入参数@weather_ns.response注解,用于描述输出参数
import requestsweather_ns = api.namespace("weather", description="Weather API")
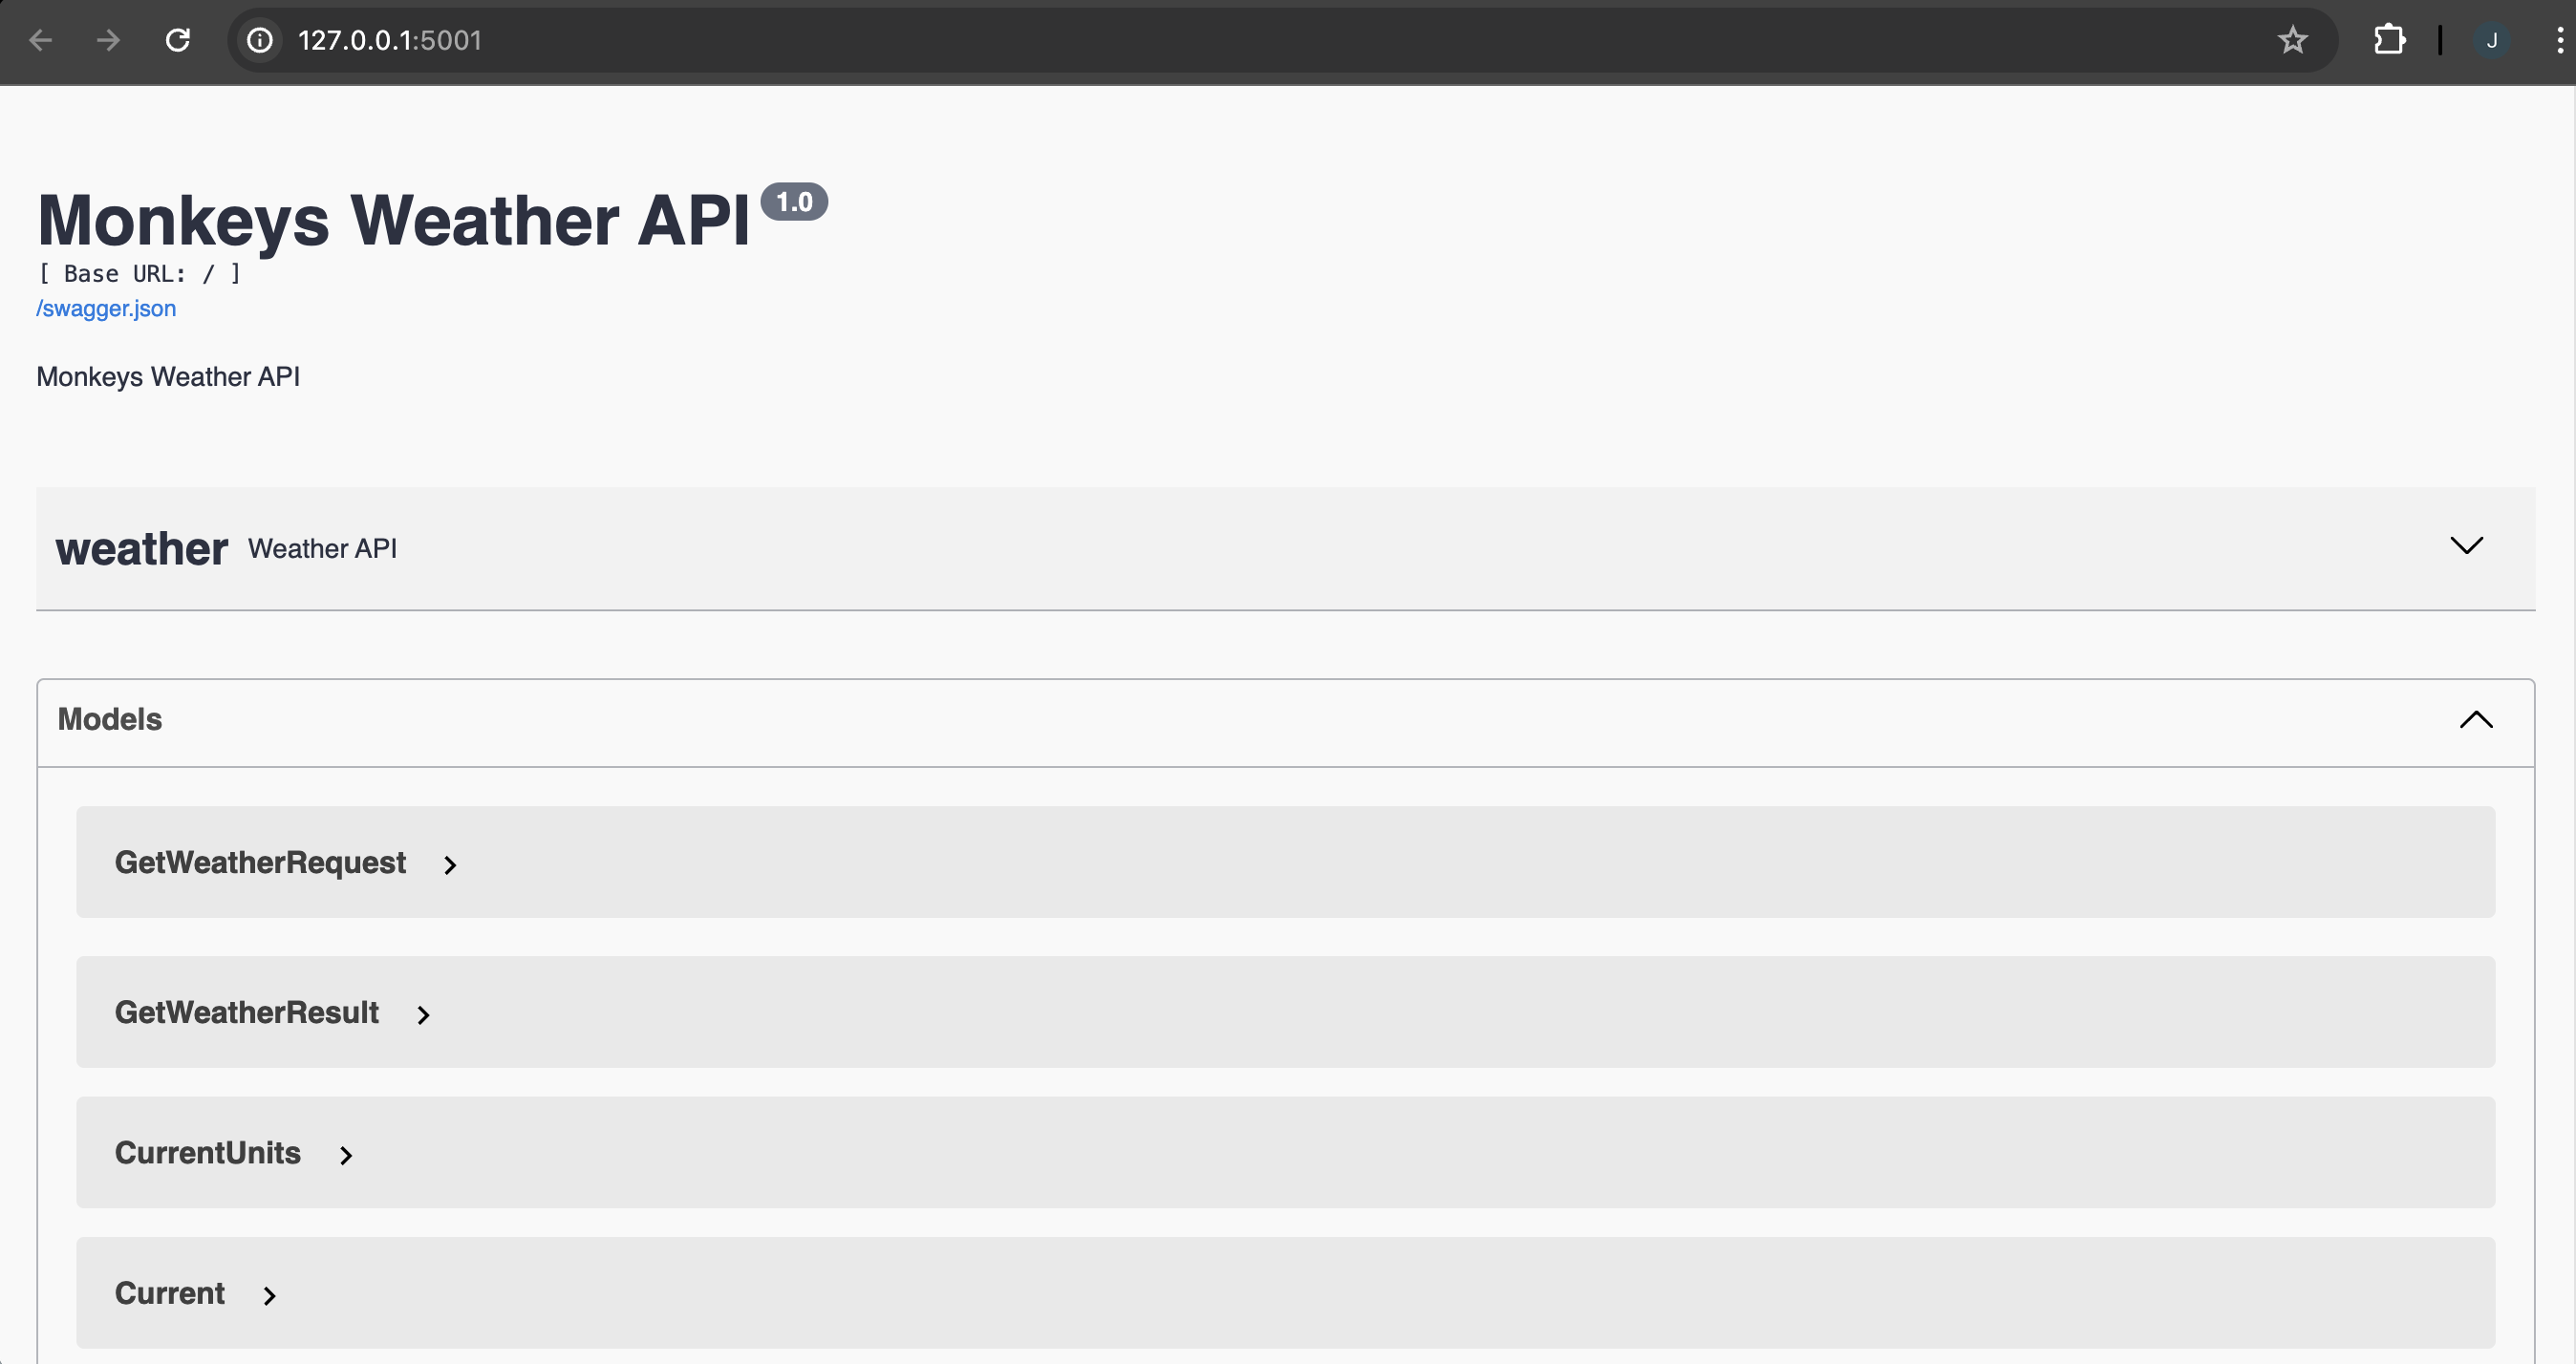
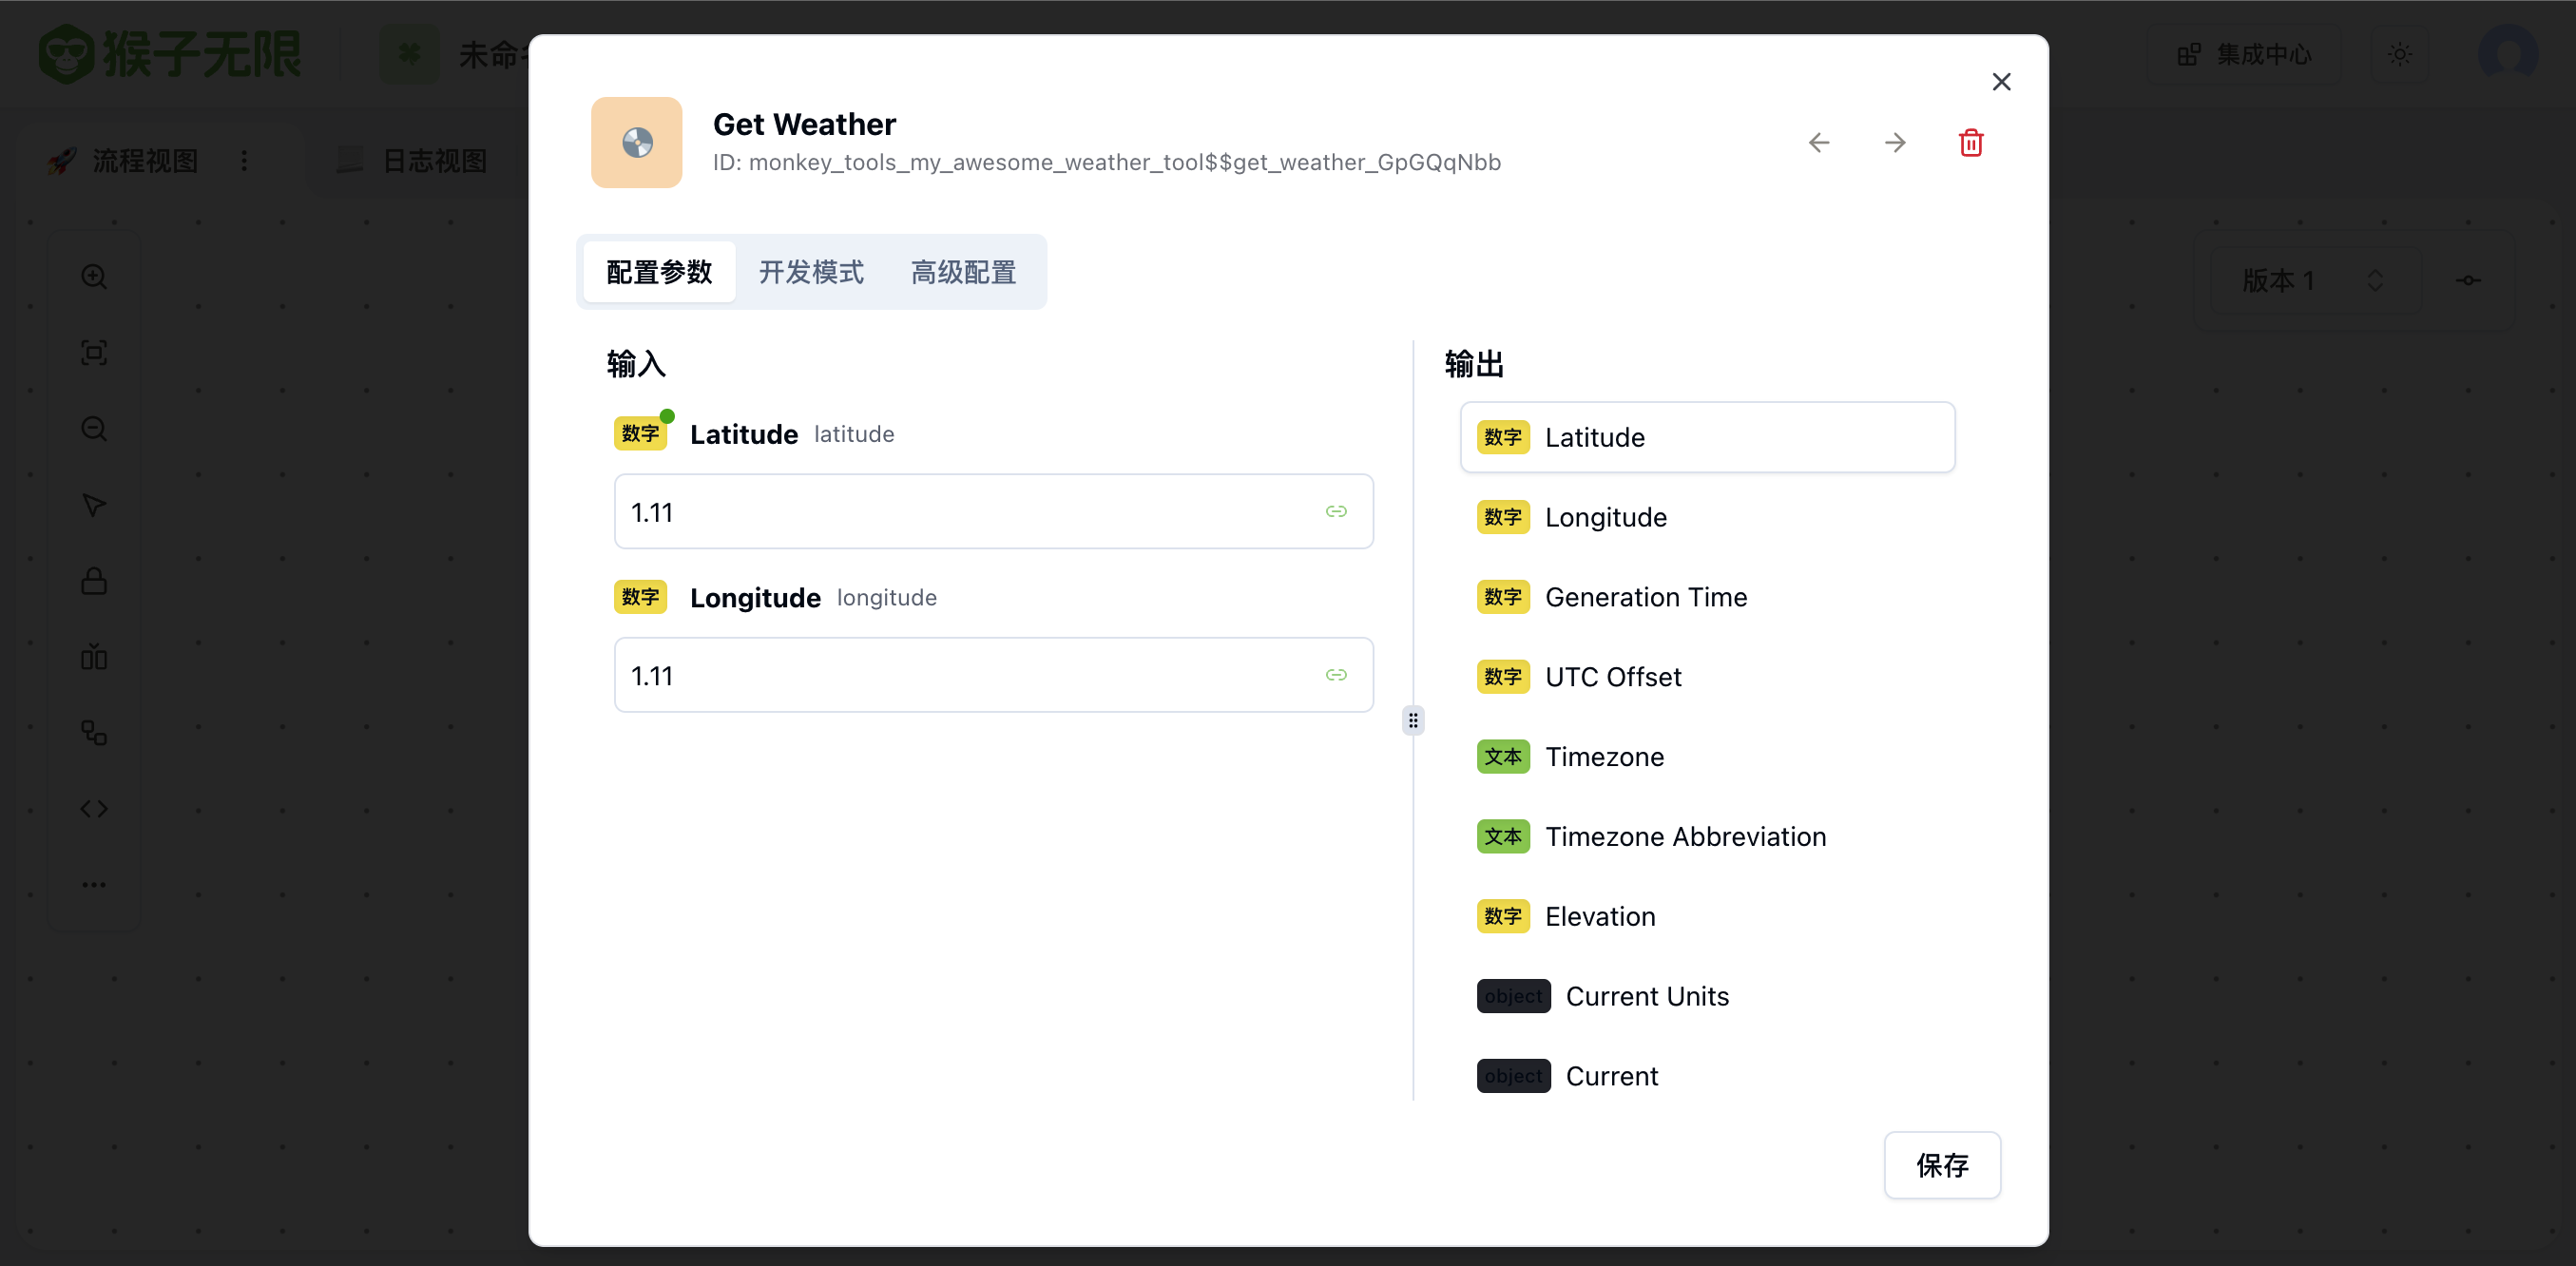
@weather_ns.route("/")class WeatherLookUpResource(Resource): @weather_ns.doc("get_weather") @weather_ns.vendor( { "x-monkey-tool-name": "get_weather", "x-monkey-tool-categories": ["weather"], "x-monkey-tool-display-name": "Get Weather", "x-monkey-tool-description": "Get Weather By Latitude and Longitude", "x-monkey-tool-icon": "emoji:💿:#e58c3a", "x-monkey-tool-input": [ { "displayName": "Latitude", "name": "latitude", "type": "number", "required": True, }, { "displayName": "Longitude", "name": "longitude", "type": "number", "required": True, } ], "x-monkey-tool-output": [ { "displayName": "Latitude", "name": "latitude", "type": "number", }, { "displayName": "Longitude", "name": "longitude", "type": "number", }, { "displayName": "Generation Time", "name": "generationtime_ms", "type": "number", }, { "displayName": "UTC Offset", "name": "utc_offset_seconds", "type": "number", }, { "displayName": "Timezone", "name": "timezone", "type": "string", }, { "displayName": "Timezone Abbreviation", "name": "timezone_abbreviation", "type": "string", }, { "displayName": "Elevation", "name": "elevation", "type": "number", }, { "displayName": "Current Units", "name": "current_units", "type": "object", }, { "displayName": "Current", "name": "current", "type": "object", }, { "displayName": "Hourly Units", "name": "hourly_units", "type": "object", }, { "displayName": "Hourly", "name": "hourly", "type": "object", } ], "x-monkey-tool-extra": { "estimateTime": 5, }, } ) @weather_ns.expect( weather_ns.model( "GetWeatherRequest", { "latitude": fields.Float(required=True, description="Latitude"), "longitude": fields.Float(required=True, description="Longitude"), }, ) ) @weather_ns.response( 200, "Success", weather_ns.model( "GetWeatherResult", { "latitude": fields.Float(description="Latitude"), "longitude": fields.Float(description="Longitude"), "generationtime_ms": fields.Float(description="Generation Time"), "utc_offset_seconds": fields.Integer(description="UTC Offset"), "timezone": fields.String(description="Timezone"), "timezone_abbreviation": fields.String(description="Timezone Abbreviation"), "elevation": fields.Float(description="Elevation"), "current_units": fields.Nested( weather_ns.model( "CurrentUnits", { "time": fields.String(description="Time"), "interval": fields.String(description="Interval"), "temperature_2m": fields.String(description="Temperature 2m"), "wind_speed_10m": fields.String(description="Wind Speed 10m"), }, ) ), "current": fields.Nested( weather_ns.model( "Current", { "time": fields.String(description="Time"), "interval": fields.Integer(description="Interval"), "temperature_2m": fields.Float(description="Temperature 2m"), "wind_speed_10m": fields.Float(description="Wind Speed 10m"), }, ) ), "hourly_units": fields.Nested( weather_ns.model( "HourlyUnits", { "time": fields.String(description="Time"), "temperature_2m": fields.String(description="Temperature 2m"), "relative_humidity_2m": fields.String(description="Relative Humidity 2m"), "wind_speed_10m": fields.String(description="Wind Speed 10m"), }, ) ), "hourly": fields.Nested( weather_ns.model( "Hourly", { "time": fields.List(fields.String, description="Time"), "temperature_2m": fields.List(fields.Float, description="Temperature 2m"), "relative_humidity_2m": fields.List(fields.Integer, description="Relative Humidity 2m"), "wind_speed_10m": fields.List(fields.Float, description="Wind Speed 10m"), }, ) ), }, ), ) def get(self): """ Example output:{ "latitude": 52.52, "longitude": 13.419998, "generationtime_ms": 0.1291036605834961, "utc_offset_seconds": 0, "timezone": "GMT", "timezone_abbreviation": "GMT", "elevation": 38.0, "current_units": { "time": "iso8601", "interval": "seconds", "temperature_2m": "°C", "wind_speed_10m": "km/h" }, "current": { "time": "2024-04-12T10:15", "interval": 900, "temperature_2m": 17.5, "wind_speed_10m": 16.4 }, "hourly_units": { "time": "iso8601", "temperature_2m": "°C", "relative_humidity_2m": "%", "wind_speed_10m": "km/h" }, "hourly": { "time": [ "2024-04-12T00:00", "2024-04-12T01:00", "2024-04-12T02:00", "2024-04-12T03:00", "2024-04-12T04:00", "2024-04-12T05:00", ], "temperature_2m": [ 13.1, 12.9, 12.6, 12.9, 12.8, 12.9, ], "relative_humidity_2m": [ 78, 80, 82, 81, 81, 81, ], "wind_speed_10m": [ 3.6, 5.9, 7.2, 7.7, 7.4, 6.4, ] }} """ json = request.json latitude = json.get("latitude") longitude = json.get("longitude") api = f"https://api.open-meteo.com/v1/forecast?latitude={latitude}&longitude={longitude}¤t=temperature_2m,wind_speed_10m&hourly=temperature_2m,relative_humidity_2m,wind_speed_10m" r = requests.get(api) return r.json()重启服务,你可以在 Swagger API 文档中看到你的接口已经添加成功了。
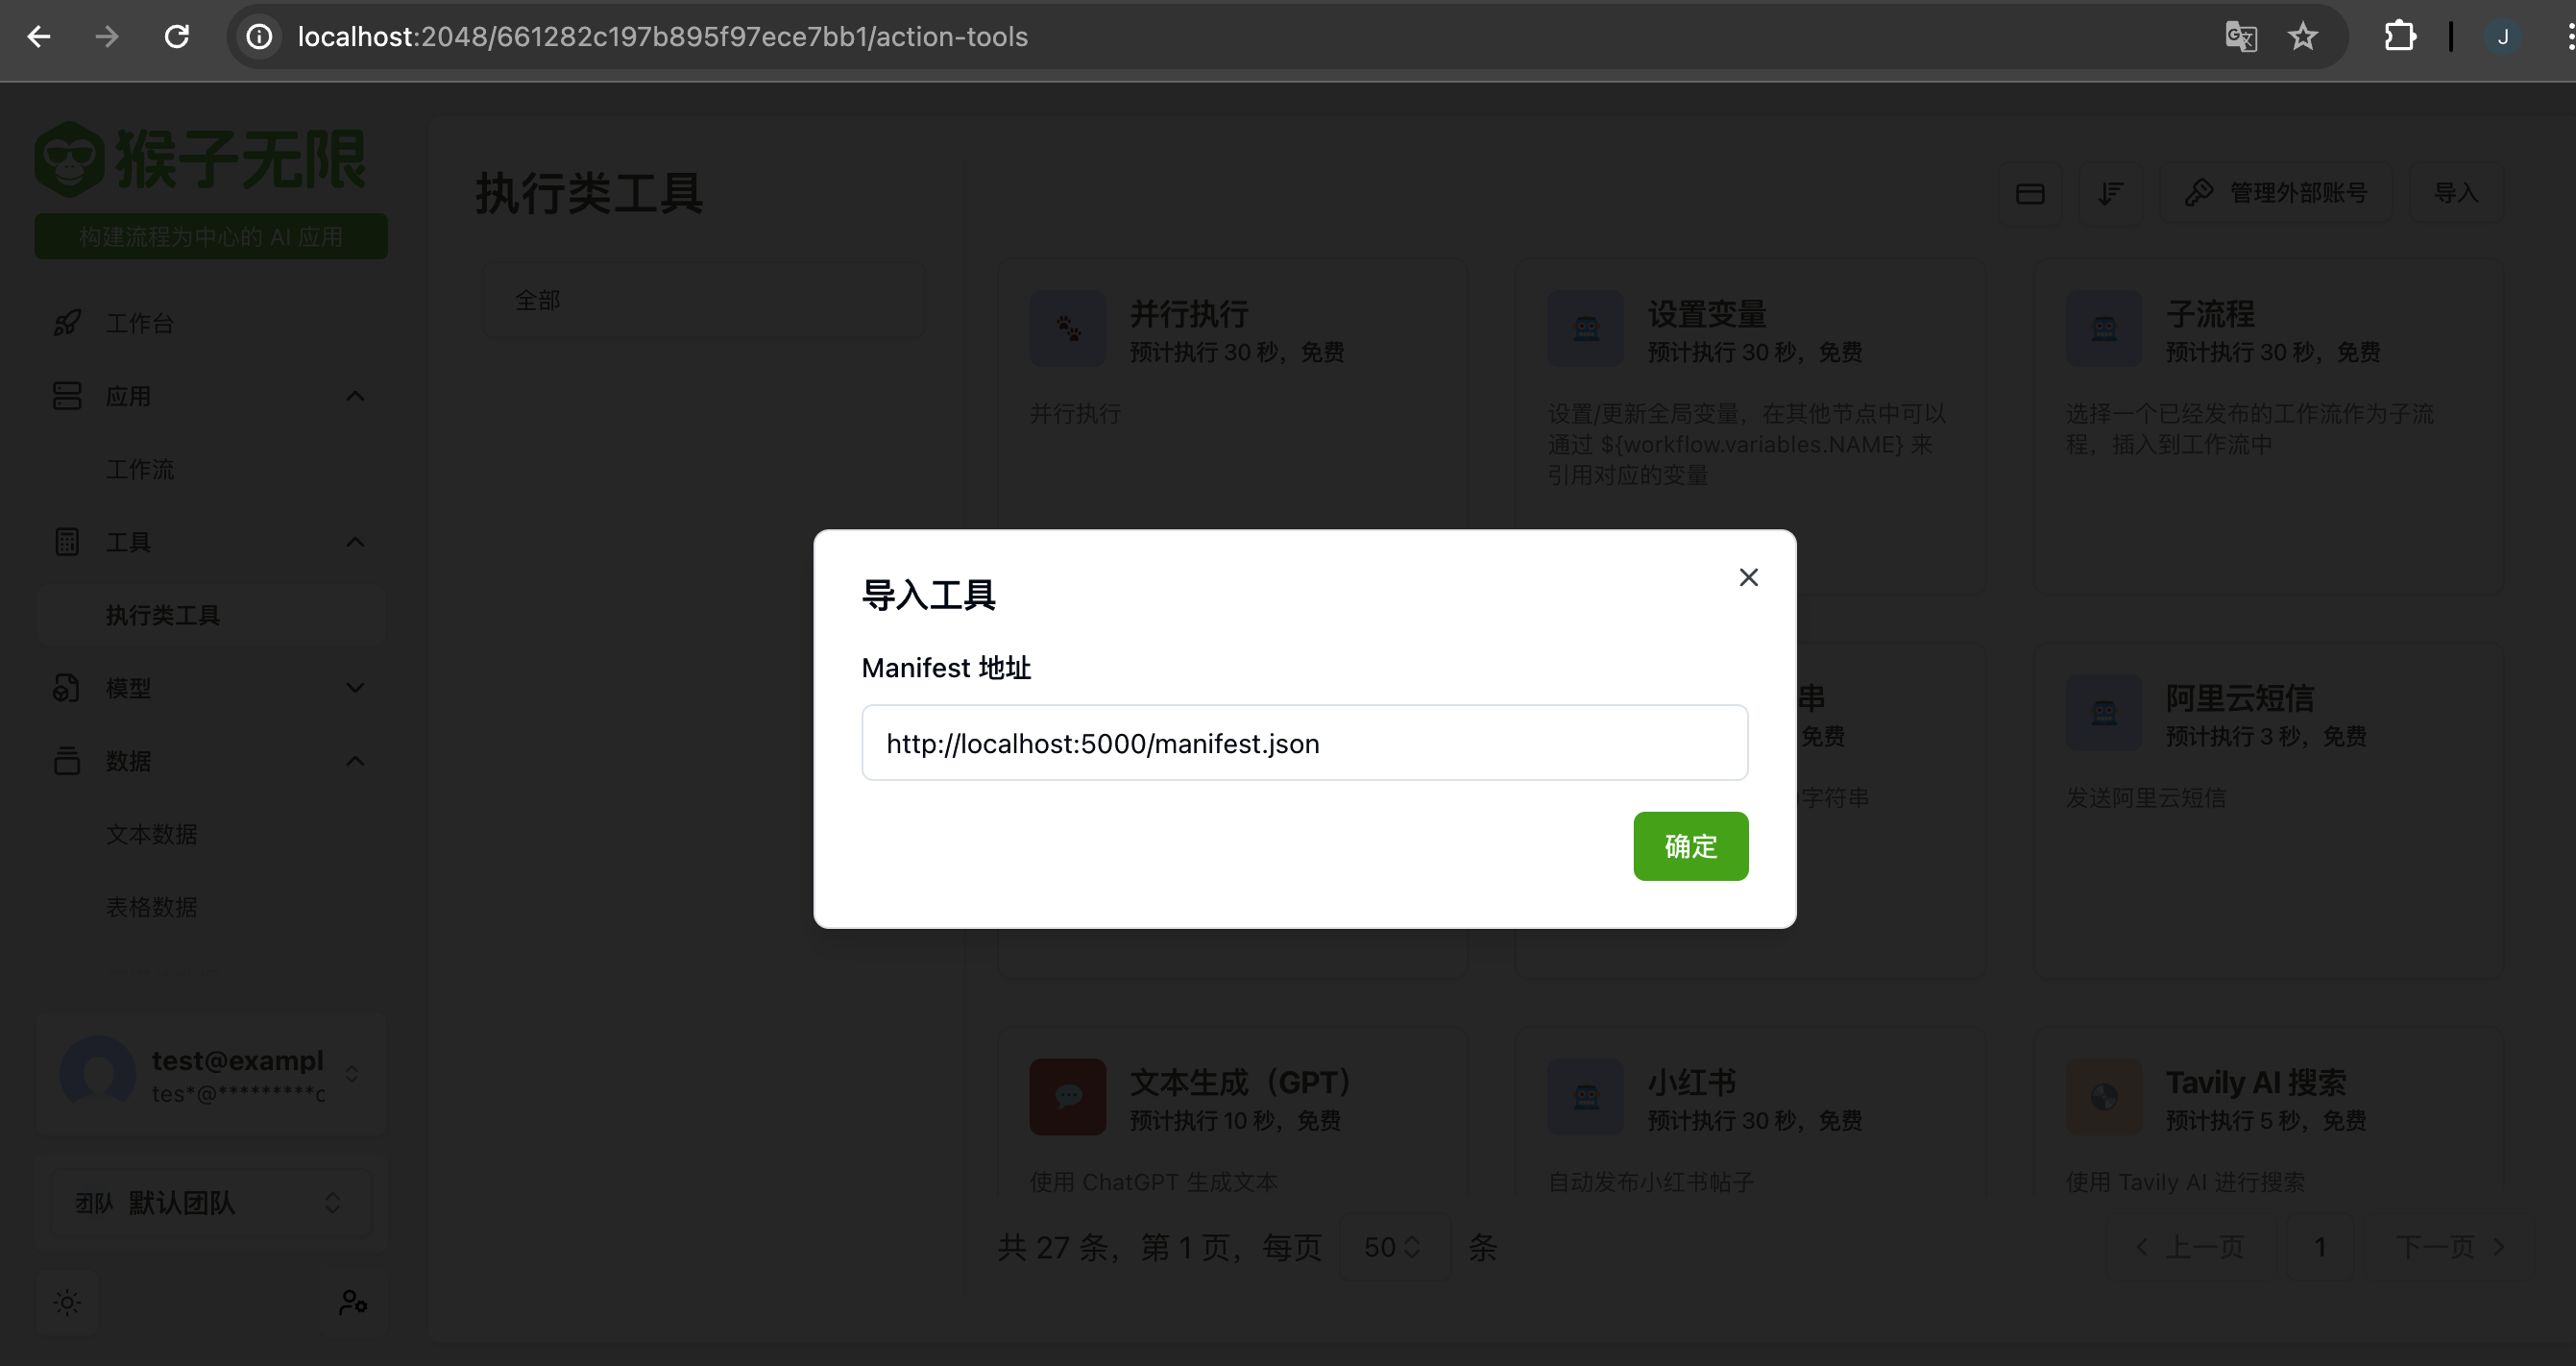
导入 Monkeys 平台
将 Tools 导入到 Monkeys 平台,你只需要填入 Manifest JSON 的地址即可,这个示例中,我们的地址是 http://localhost:5000/manifest.json。
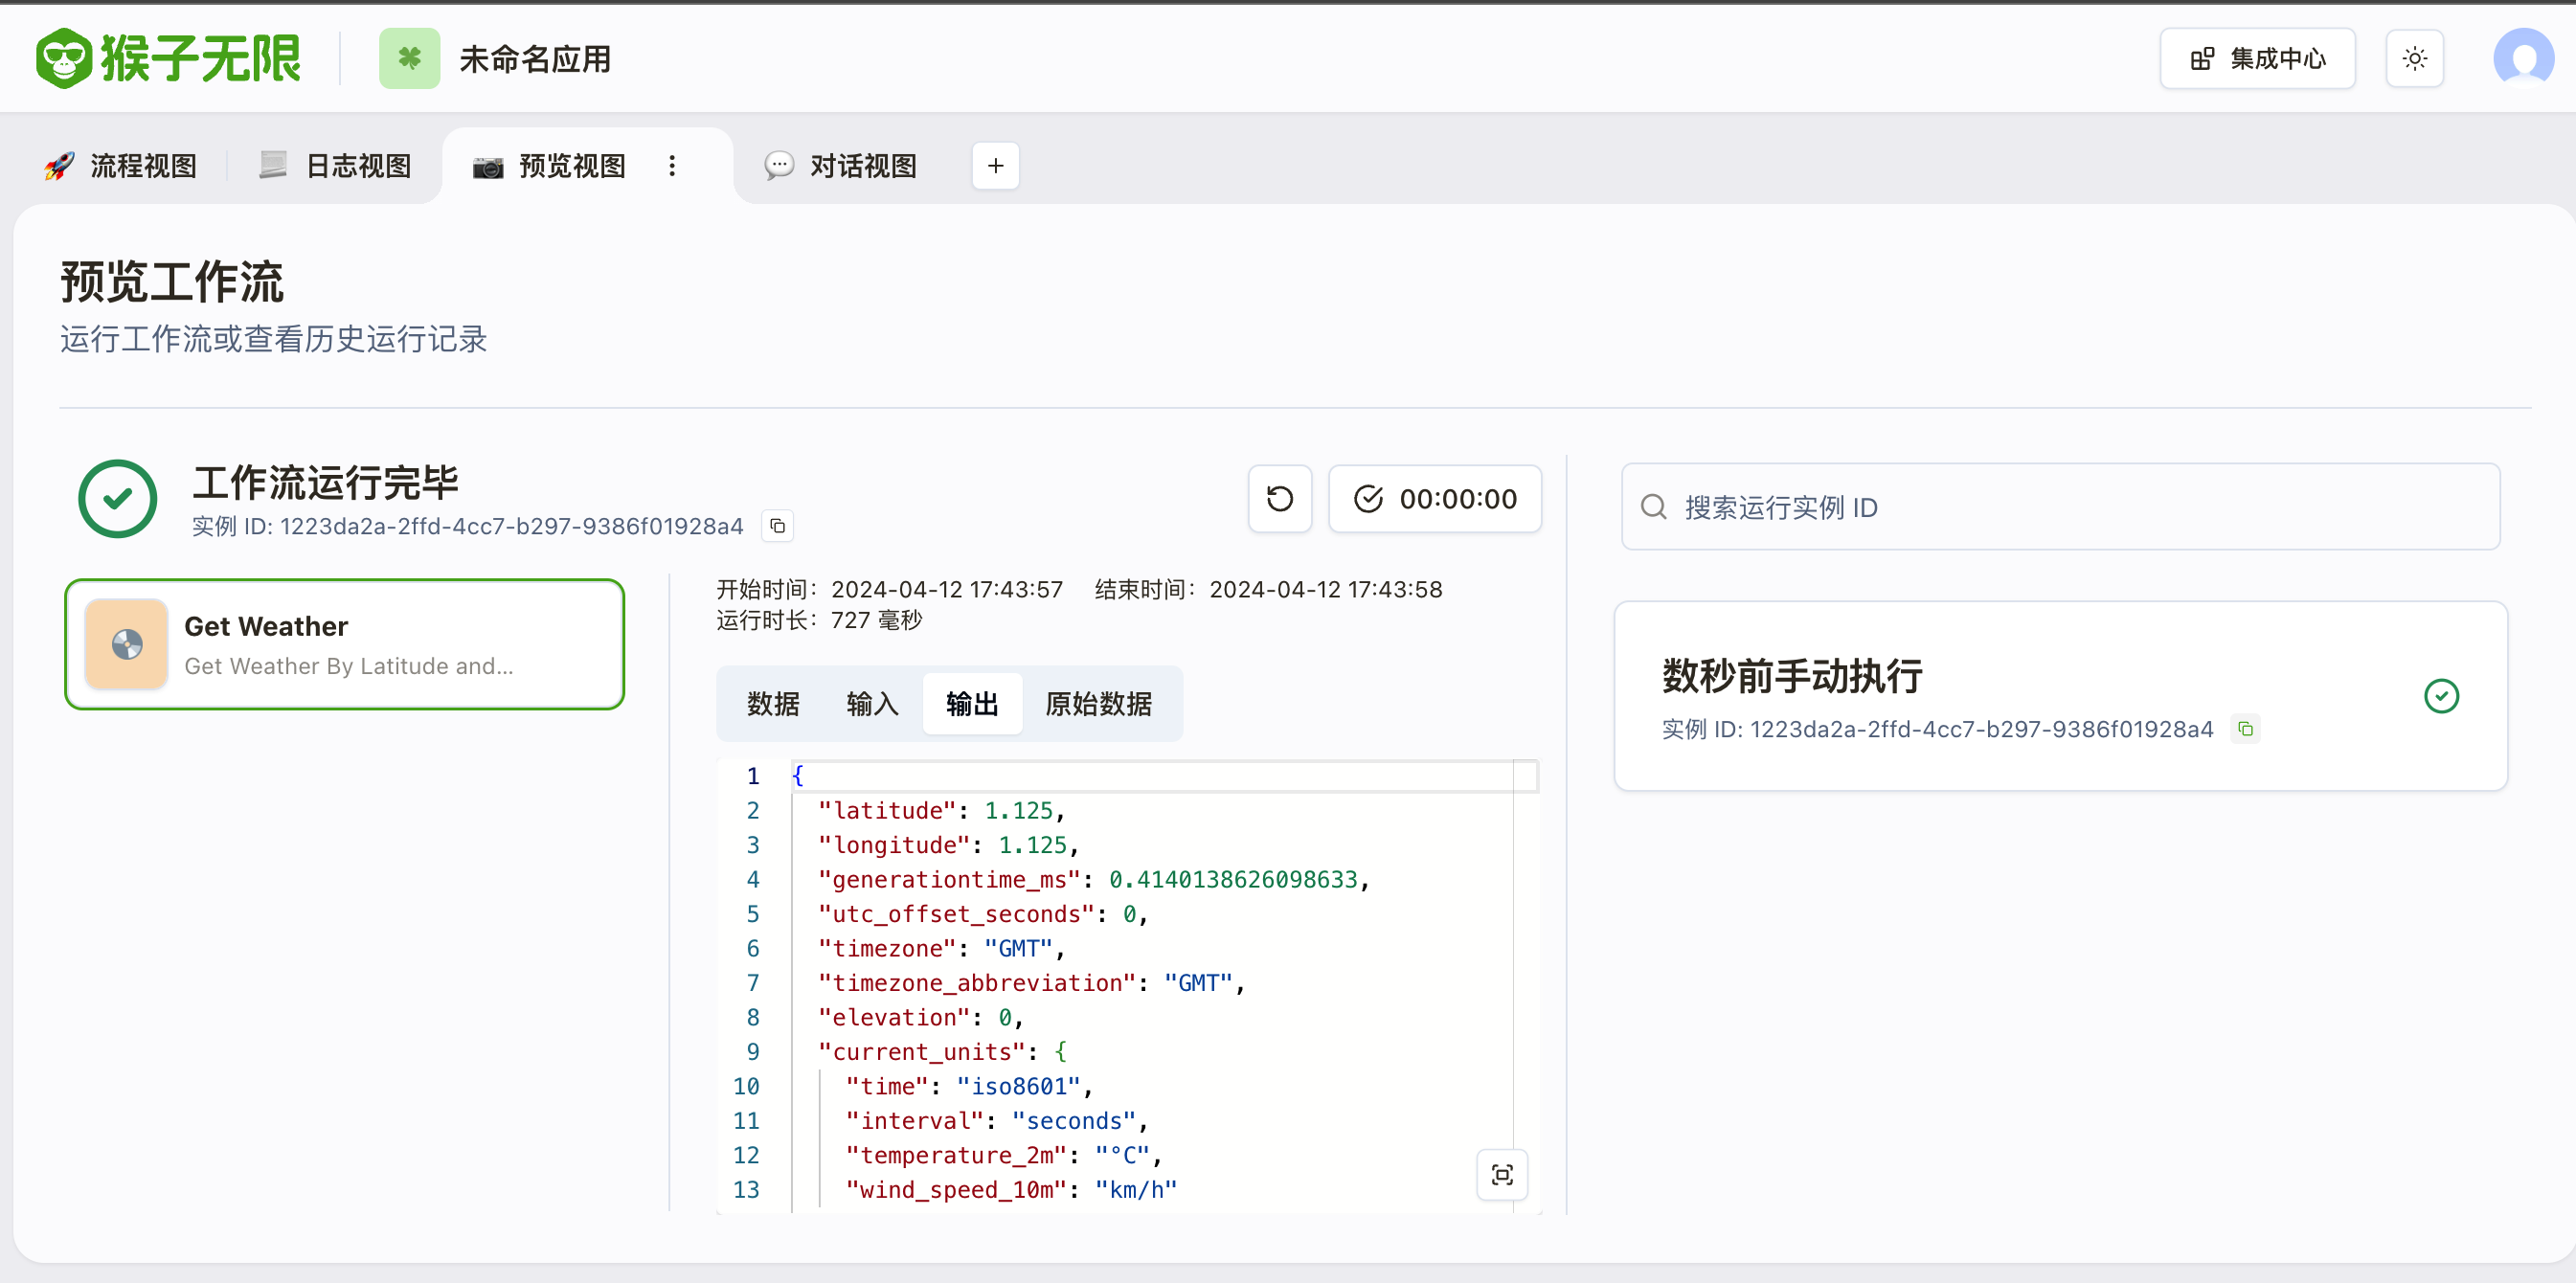
导入成功之后,你应该可以在 Monkeys 平台中看到你的 Tool 了。
执行工作流,可以看到你的 Tool 已经被成功调用了。